Setup Ucommerce to Include Braintree Payments as a Payment Method
Ucommerce comes with built-in support for Braintree payments. This guide will walk you through getting Ucommerce to work with Braintree for payment processing.
With Braintree you are responsible for hosting the payment form. A simple form is provided by Ucommerce, but it will need a better look and feel. The current integration is based on Braintree Drop-in UI.
A wide range of currencies are available, but you decide which currency to use when you create a merchant account. Each merchant account can only process a single currency.
Capabilities
Braintree has been upgraded to v5.2.0 in order to take advantage of 3DS2 feature. For more info see the Braintree docs for 3DS2.
Braintree is one of the payment providers which support the Acquire, Cancel, and Refund functionality. You can see how to enable this here.
Settings in Ucommerce
If you haven't completed the steps from the General Setup of Payment Methods in Ucommerce document, you need to do that before you move on. The back-end displays the different settings you can set for Braintree.
Optional Settings in Braintree gateway
To see the settings, log into your account or sandbox account.
On the Menu at the top, click “Processing” - here you can see a wide range of optional settings.
Configuring the new payment method
Now we need to edit the payment method we created previously.
Some of the below information are found in the Braintree gateway so log-in in if you haven't done that already.
Finding configuration
-
keys - in Braintree gateway at the top right click “Settings” -> “API”, here you find
- MerchantId
- PublicKey
- PrivateKey
-
CallbackUrl
- Unless you have implemented your own version of the callback handling, this should be set to “(auto)”.
-
PaymentFormUrl
- You can optionally host the payment form inside your own pages. To do this override the value “(auto)” with the URL on which the payment form is rendered.
- Remember to use the CommerceLibrary:RenderPaymentForm or the RenderPage of the IPaymentWindow. Please find code samples in a later section.
-
PaymentFormTemplate
- Path to the paymentFormTemplate.
- the default
BraintreePaymentForm.htmis located under\ucommerce\Apps\Braintreefolder
-
AcceptUrl and DeclineUrl
- To get the customer redirected back to you page after ended payment, you have to specify a return url depending on payments result: Accept or decline.
-
TestMode
- Test mode will toggle the payment method service to use a test environment - sandbox account.
- Valid values “true” or “false”.
Set the look and feel on the Payment Form
The payment form is populated with the contents of paymentFormTemplate file chosen in the configuration. The BraintreePaymentForm.htm becomes a standard HTML page with a form so you can customize it as you need.
The Ucommerce Braintree provider will insert values at runtime by replacing placeholder values, e.g. ##XX## tags.
-
The following 2 tags are essential for the payment flow to work:
##CLIENT_TOKEN##- server generated token used for initializing the Drop-in UI.##CALLBACK_URL##- ensures form on submit reachesProcessCallbackmethod.
Content Security Policy settings
In some cases you will need to adjust the Content Security Policy.
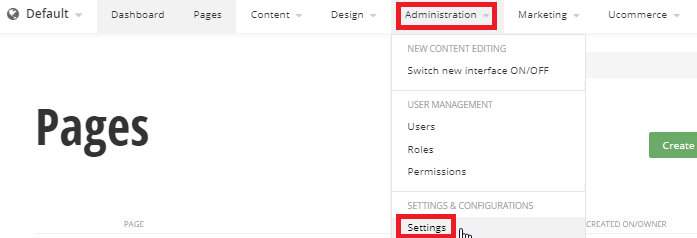
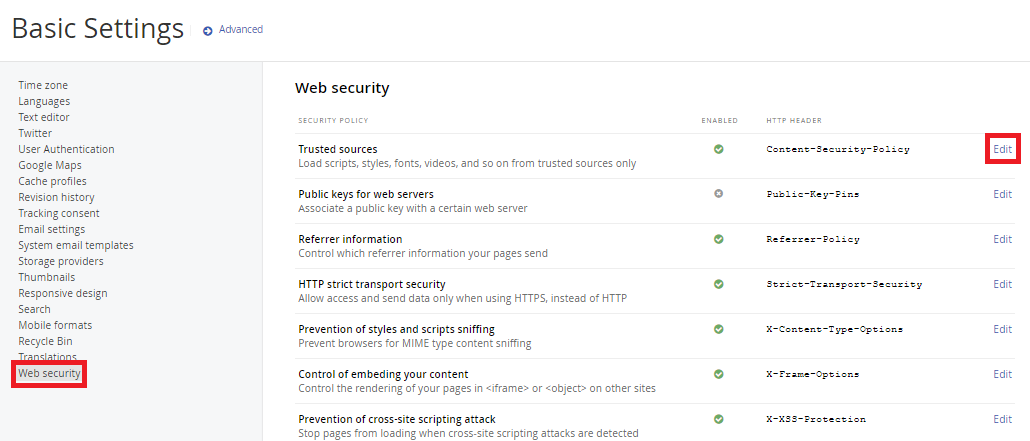
For example when using Ucommerce.Sitefinity.UI ensure that your CSP settings under
“Administration” -> “Settings”

“Web security” -> “Trusted sources” -> “edit”

contain the following:
    Any content
    'self'

    Scripts
    'self'
    'unsafe-inline'
    'unsafe-eval'
    js.braintreegateway.com
    *.cardinalcommerce.com

    Styles
    'self'
    'unsafe-inline'
    *.braintreegateway.com

    Child sources
    'self'
    assets.braintreegateway.com
    *.cardinalcommerce.com

    Connect sources
    'self'
    *.sandbox.braintree-api.com
    *.cardinalcommerce.com
    *.sandbox.braintreegateway.com
