
Understanding Ucommerce Order Statuses
When implementing an e-commerce solution, you might need to adapt your solution to either your own, or your client’s order fulfillment process. To support a flexible workflow around this process, Ucommerce supports configurable order statuses.
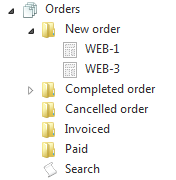
Out of the box, Ucommerce comes with 5 statuses preconfigured.
- New order
- Completed order
- Invoiced
- Paid
- Cancelled
Each status can be configured as being part of the fulfillment process.
To edit each status, you need to start up Sql Management studio, and open the ucommerce_orderstatus table.

Note that there are a 6th status – Basket. This is used to handle baskets on the public facing site, so please do not delete it.
You should note the following columns:
| Column | Description |
|---|---|
| OrderStatusId | The primary key of the order status. |
| Name | The name of the status, displayed under the Orders-node in Ucommerce admin. |
| Sort | The sort order in Ucommerce admin. |
| RenderChildren | Defines whether or not orders should be rendered in the tree for this status. Handy for the final order status, where you hopefully will have a lot of orders. |
| NextOrderStatusId | Defines which status (referenced by OrderStatusId) is the next in the order process. For example, a new order can only be promoted to a completed order. |
| IncludeInAuditTrail | If set to true, the audit trail will be updated when an order’s status is set to this status. |
| AllowUpdate | If set to false, no more status changes can be made to orders with this status. |
| AlwaysAvailable | If set to true, this status is always available from any order status, except for those where AllowUpdate is set to false. Handy for a cancelled-status. |
| Pipeline | Here you can put the name of a pipeline you would like executed when an order is set to this status. For example, when an order is set to Invoiced, you might want to capture an online payment, or if an order is returned, you want to put the products back in stock and debit the customer’s account. |
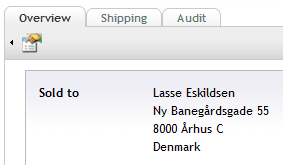
When viewing an order in Ucommerce admin, you can change an order’s status by clicking the “Change Status” button in the toolbar.
In the Update Order Status popup, the rules you set up in the ucommerce_orderstatus table is followed, and the user cannot bypass the defined order flow.

Changing Order Status via Code
    var newOrderStatus = OrderStatus.All().Single(x => x.Name == "Completed");

    // ChangeOrderStatus will also execute the pipeline associated the status the order is moving to
    var orderService = ObjectFactory.Instance.Resolve<IOrderService>();
    orderService.ChangeOrderStatus(order, newOrderStatus);