
Setup Ucommerce to Include Authorize.Net as a Payment Method
Ucommerce comes with built-in support for Authorize.Net payments. This guide will walk you through getting Ucommerce to work with Authorize for payment processing.
Capabilities
Authorize.Net is one of the payment providers which support the Acquire, Cancel, and Refund functionality. You can see how to enable this here.
Settings in Ucommerce
If you haven't completed the steps from the General Setup of Payment Methods in Ucommerce document you need to do that before you move on.
When the payment method is created and saved as described in here. The back-end displays the different settings you can set for Authorize.NET.
Settings in Your Back-end Office at Authorize.NET
You log in using the “Merchant Log In” page.
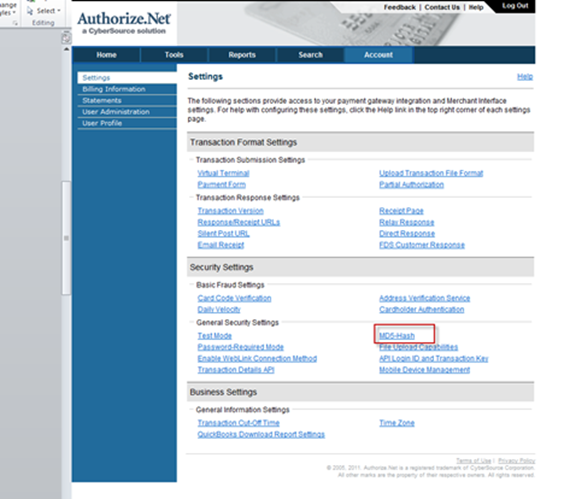
First you need to log in to your back-end office at http://Authorize.net.
We need to configure your MD5-Hash used for secure communication between your server and Authorize.NET. Click MD5-Hash and create and submit. You need to have this ready by your hand in one of the following steps.
Next we need to configure the payment form.
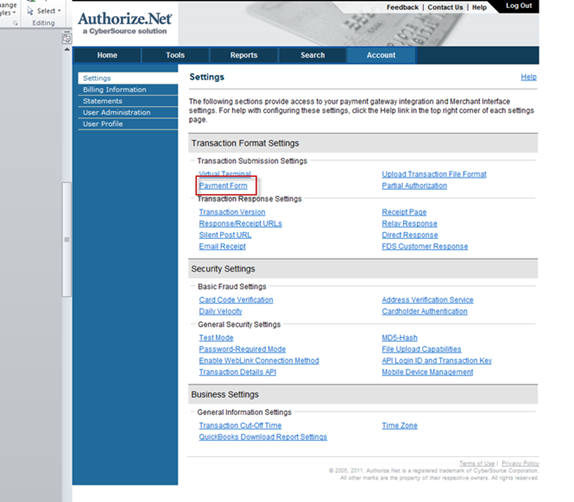
Click “Form fields” in the page you enter after clicking “Payment Form” on the page above.
Check the following boxes off:

Now we need to visit “API Login ID and Transaction key” section.
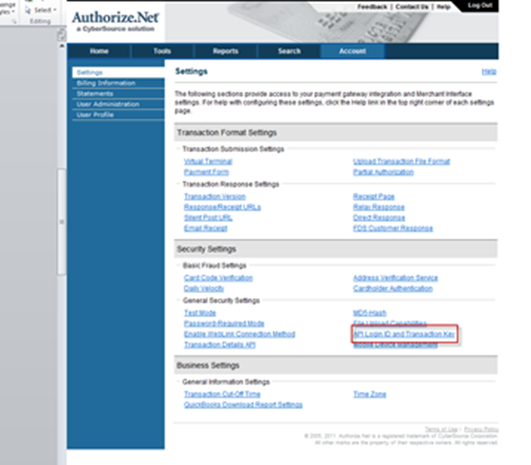
Now you need to create a Transaction Key by answering your secret question which you created upon creating your Authorize.NET account.
Make sure you have the “API Login ID” and “Transaction Key” by your hand as you need them in the last step on finishing the configuration.

Configuring the Authorize.Net payment method
Now we need to edit the ”Authorize.Net” configuration fields for your payment method.
Parameter list for the configuration fields:
Parameter name
Value
apiLogin
The API login ID from the backend. Please refer to section of settings in Authorize.NET backend
TransactionKey
The transaction key you’ve created in the back-end configuration.
Md5Hash
You’ll have to define this hash key yourself. Please refer to section of settings in Authorize.NET backend
CallbackUrl
Unless you have implemented your own version of the callback handling, this should be set to “(auto)”.
acceptUrl
This URL redirects your customer back to a specific page at your site after a successful authorization.
declineUrl
This URL redirects your customer back to a specific page at your site if an authorization is declined.
payType
Tells our system what command to send to Authorize.NET
testMode
Set this to true when testing the application in production mode. When testing against sandbox this also needs to be set to true.
instantAcquire
Perform instant capture on payment or authorization of a payment.
sandboxMode
Set to true for the sandbox environment and false for test/live environments. Sandbox mode only accept US Dollar as currency.
Congratulation - your website now includes payments with the Authorize.NET.
Important: When authorization has been succesfully completed, Authorize will redirect the customer to the acceptpage but notice this page will be under the Authorize.Net’s URL. This is not an error.