
Abandoned Basket Functionality in Kentico
This article describes how to set up an abandoned basket e-mail flow in Ucommerce for Kentico. Everything below is an example and can be customized depending on customer needs. The information below shows how to set up everything to work similarly to our demo store.
Note! In order to be able to set up an automated abandoned basket process, it is required to have a license that enables EMS capabilities for the Kentico installation.
Setting up the Scheduled Task
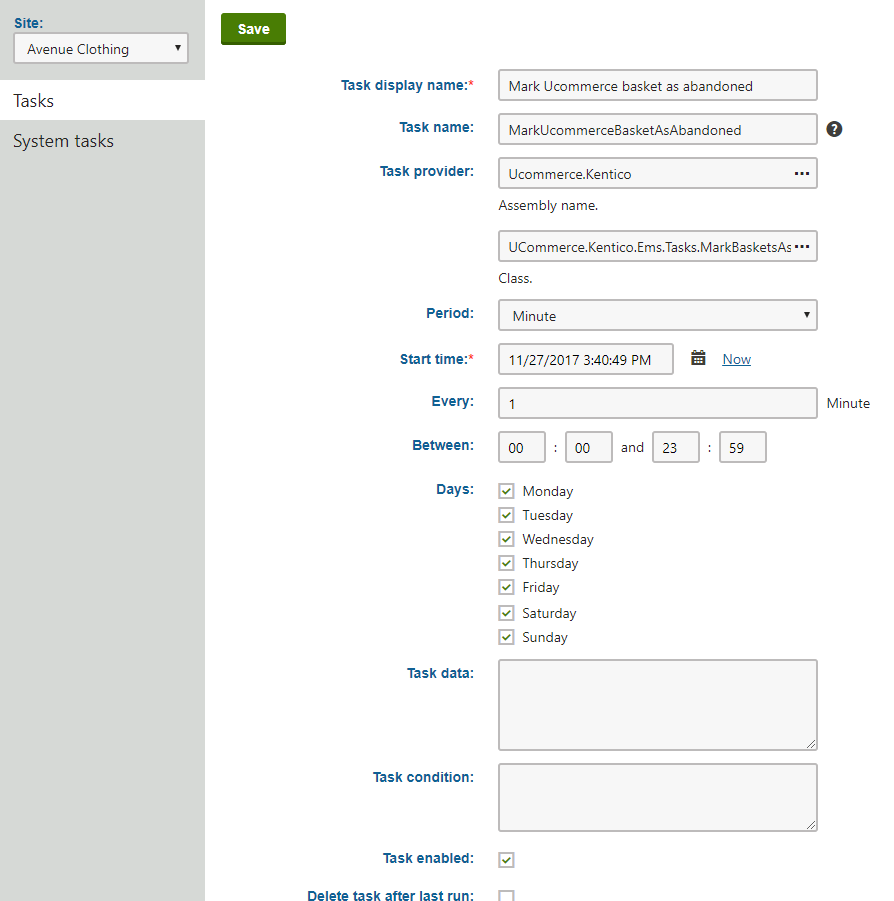
The first step is setting up a scheduled task inside Kentico's Scheduled tasks application. Generally, this task will be site-specific, by selecting a site from the drop-down menu in the left-hand menu. The task needs a descriptive Display Name and a Start time.
Ucommerce, out-of-the-box comes with a task that will iterate through the baskets in the system, and mark old ones as abandoned. To use this task, the scheduled task will be configured with the following:
Task provider - Assembly name: Ucommerce.Kentico
Task provider - Class: UCommerce.Kentico.Ems.Tasks.MarkBasketsAsAbandonedTask
Every: 1 Minute
Task enabled: Checked.
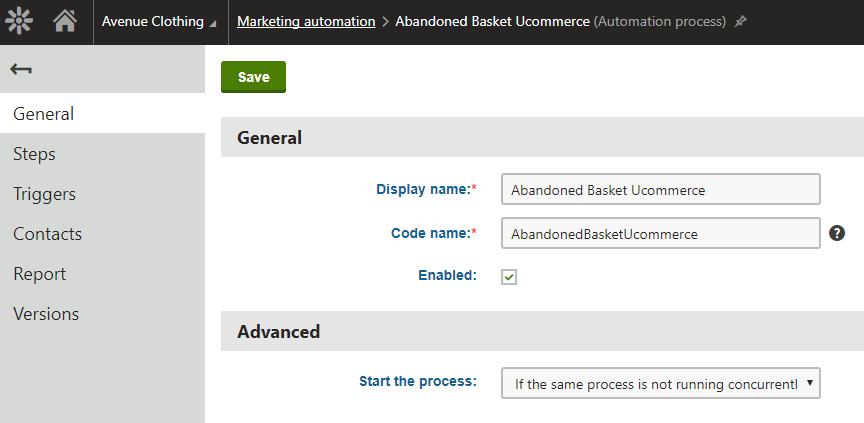
Creating the Marketing Automation Process
The next step is to create a new process in the Marketing Automation application. We configured the process as shown below, but of course, the steps can be customized:
- The General tab:
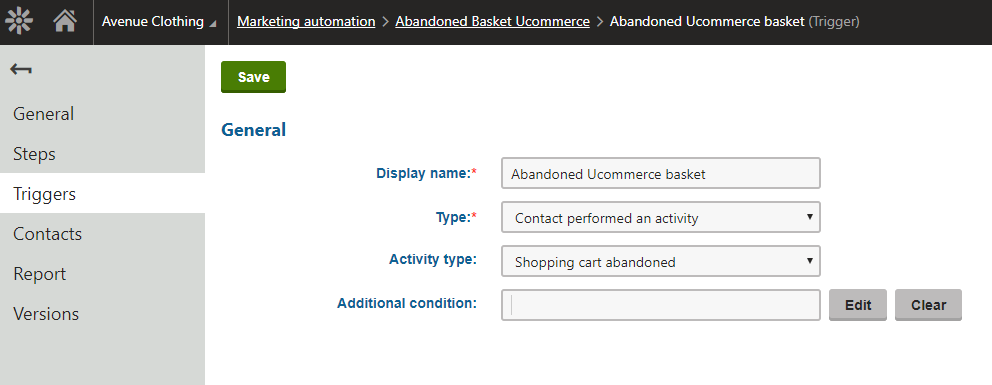
- In the Triggers tab we create a new trigger:
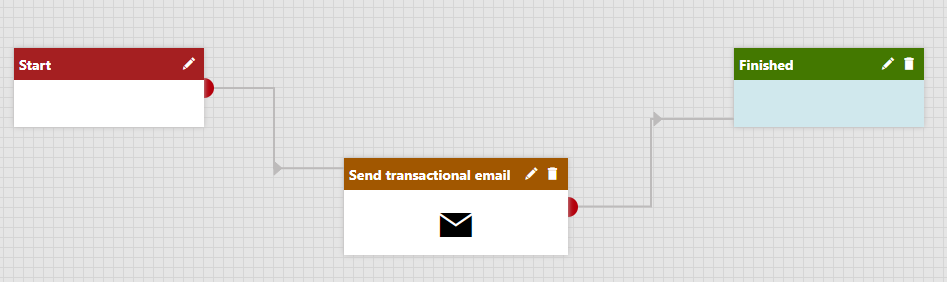
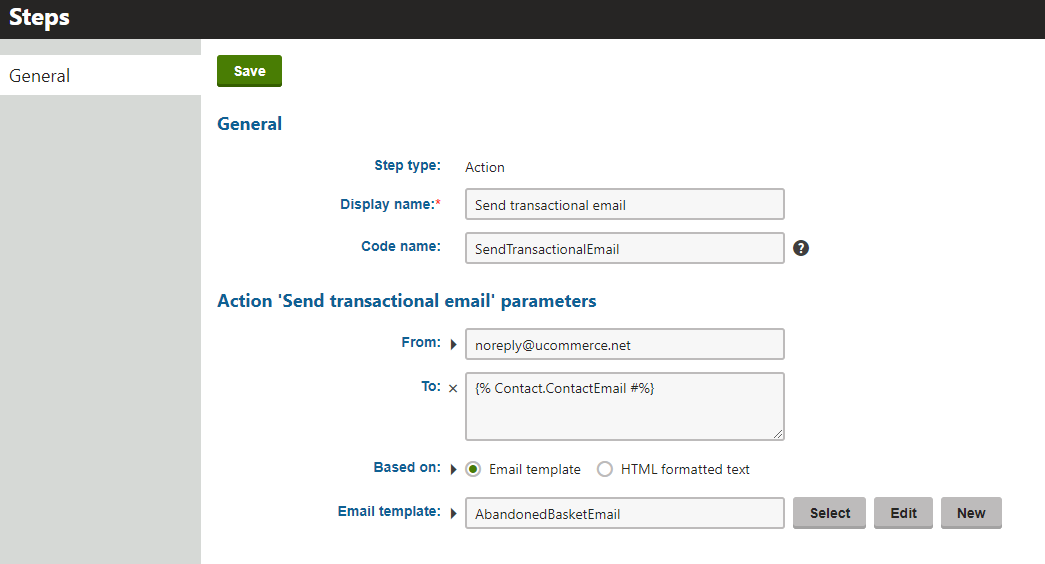
- In the Steps, we add a new 'Send transactional email' step:
Configuring the Transactional Email
Next, we configure the email that will be sent to users when their basket is abandoned:
We use a Kentico macro to set the recipient. Next, the email template's body will use a Ucommerce macro to return the OrderLines from the abandoned basket based on the ActivityValue, and apply a transformation to display it in a nice way:
{% ApplyTransformation(Ucommerce.GetBasketOrderLines(ActivityValue), "AvenueClothing.Transformations.DisplayOrderline") |(encode)false #%}
ActivityValue, in this case, will be the GUID of our PurchaseOrder and the macro will return an IEnumerable of all the OrderLines in the basket for the contact.
In the case of our accelerator, we created a new transformation under the page type 'AvenueClothing.Transformations' with the name of 'DisplayOrderline'. It is of type 'Text/XML'. In the transformation we can use all public properties of an OrderLine for display:
    <td>{% ProductName %}</td>
    <td>{% Price %}</td>
    <td>{% VAT %}</td>
    <td>{% Quantity %}</td>
    <td>{% Total %}</td>
Things to Consider
-
When you run the above mentioned MarkBasketsAsAbandonedTask task, Ucommerce will mark all baskets older than a certain time abandoned. This time delay can be configured in the Kentico Settings application: Settings > E-commerce > Shopping cart > Mark shopping cart as abandoned after (hours)
-
If the 'Mark shopping cart as abandoned after' setting is increased, there is a chance that abandoned basket emails that were once sent will be re-sent, as Ucommerce will re-evaluate them as being abandoned with the new time limit. The same goes for decreasing the time, some abandoned baskets might not invoke an e-mail. We advise only setting the setting once or being very mindful when changing it.