
Install Commerce Connect for Sitecore and Ucommerce
This article will cover how to install commerce connect for Sitecore and Ucommerce. It is assumed that you have an already existing installation of Sitecore and Ucommerce. If you are interested in how to install Ucommerce, please read How to install Ucommerce.
See which version CommerceConnect is supported by Ucommerce in Sitecore Commerce Connect.
Installing Sitecore Commerce Connect
When you have a version of Sitecore and Ucommerce installed, it is time to install Commerce connect. First you have to download through Sitecore Commerce Connect page
Once you've downloaded Commerce Connect, you just need to install the package through the Sitecore package installer just like you installed Ucommerce.
Modify Ucommerce Configuration
Now you need to activate components specific to Ucommerce, located under: '/sitecore modules/shell/ucommerce/Apps' (relative to the application root).
In the folder you'll find a folder called 'Sitecore Commerce Connect.disabled'. By removing the '.disabled' part of the folder name you'll let Ucommerce include the respective set of configuration files needed for Ucommerce and Sitecore Commerce Connect.
Restart your website and Commerce Connect will be enabled with Ucommerce.
Modify Sitecore Configuration
First you need to find the configuration file: '/App_Config/Include/Sitecore.Ucommerce.Pipelines.ModifyPipelines.config.disabled' (relative to the application root)
Simply remove the .disabled extension from the file, so it represents a proper configuration like the rest of the files located under that folder.
Sitecore will now automatically include that file, which represents the Sitecore Commerce Connect specific integration points for Ucommerce.
If you are unsure that it has been activated properly, you can always check the page that reveals the Sitecore configuration: 'yourdomain.com/sitecore/admin/showconfig.aspx'.
Setting Up Data For Engagement Plans
With the configuration is in place you need to setup configure Sitecore to enable the built in engagement plans.
Configure Engagement Plans for Sitecore Commerce Connect
To configure individual engagement plans for Commerce Connect, please follow the instructions covered in "Sitecore Commerce Connect Installation Guide (A4)" in section "Configuring a Webshop" on page 5 in the Sitecore Commerce Connect page.
Setting Ucommerce
Now that you've configured the data in Sitecore you need to configure Ucommerce to observe those settings. Everything happens per store, so you need to open up the each of your created stores and pair them with a website in Sitecore.
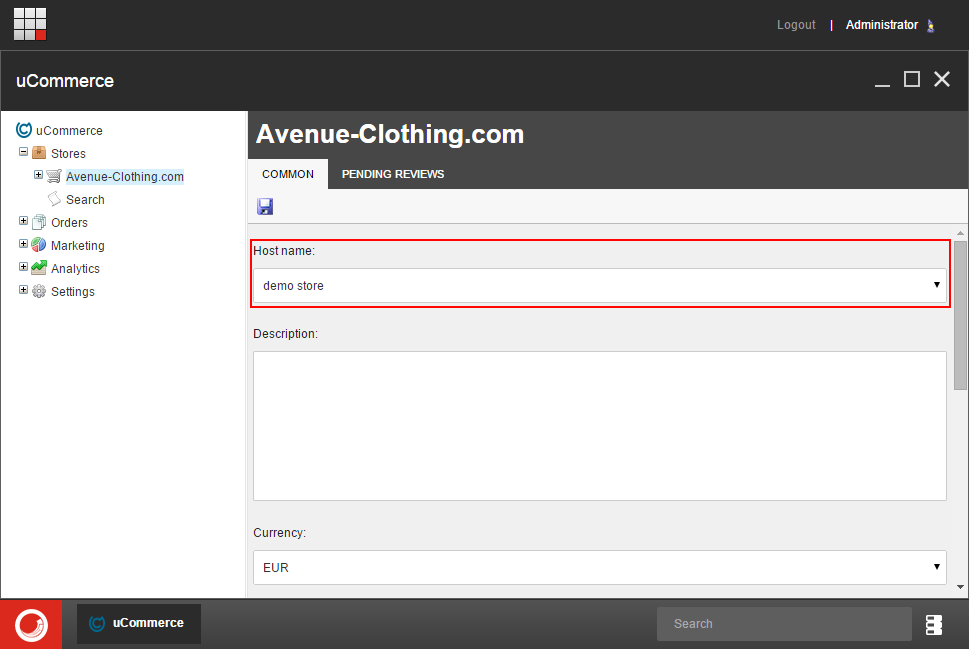
Configure Hostname For Your Store
Commerce Connect assumes a set of engagement plans per website you have, so you need to tie pair of your stores with a site configured in Sitecore, so Ucommerce knows which engagement plans to use.
To do so, select each store in Ucommerce and pick the website in the 'Hostname' setting, which corresponds to the website driving presentation for that store in Sitecore.
If your webshop enables customer login
If your webshop enables customer login you need to do the following steps to have Commerce Connect identify the logged in customer.
Configure a Role for CommerceUsers Domain
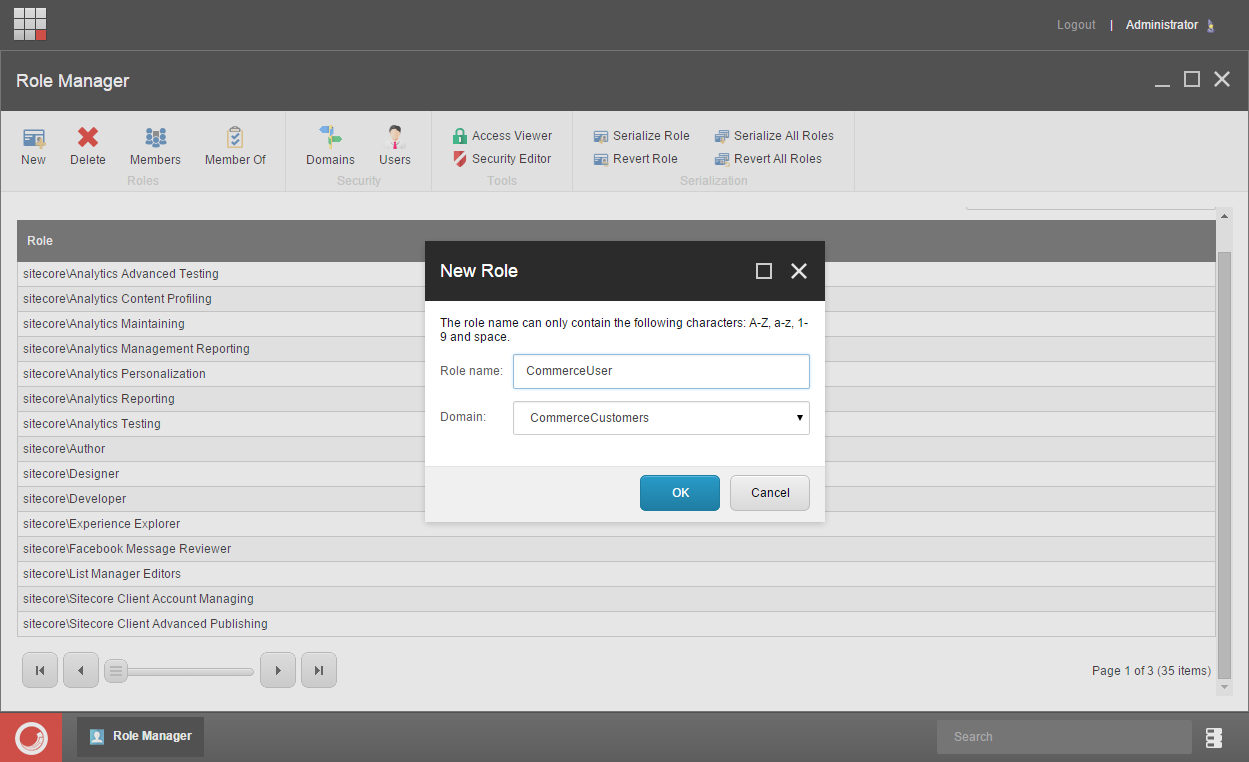
Commerce Connect assumes a domain called 'CommerceUsers' exists, which is used to tie users to orders. You need a role for said domain, so Ucommerce will be able to create a User for the domain 'CommerceUsers'.
If the domain does not exist, you need to create that first. Open up the role manager in Sitecore, and create a new Role for the domain 'CommerceUsers'. The name is of your choice and is needed by Ucommerce when creating a new member.
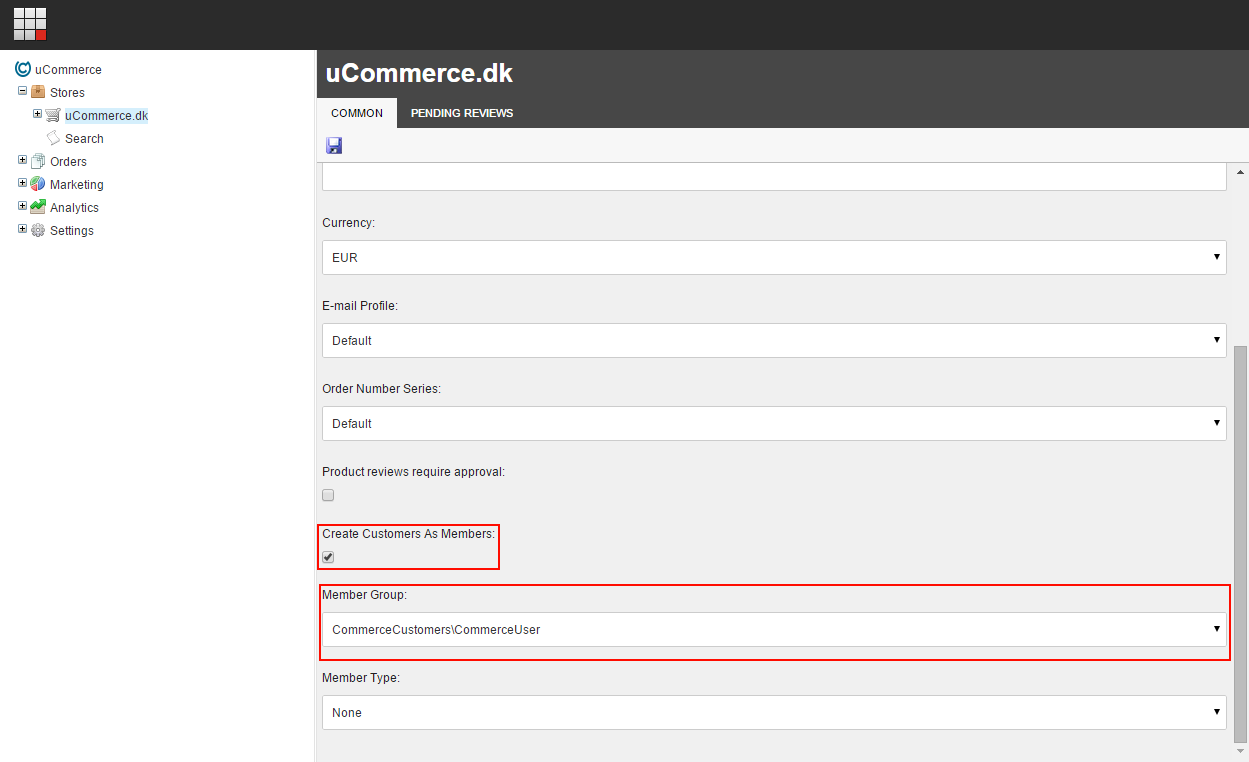
Configure Member Group
As per the new role created in Sitecore, you need to configure the member group on the store, that Ucommerce will use to create a new user. You need to select the new role for your Domain "CommerceUsers".
Enable Create Customer As Members which creates customers as members in the checkout pipeline.
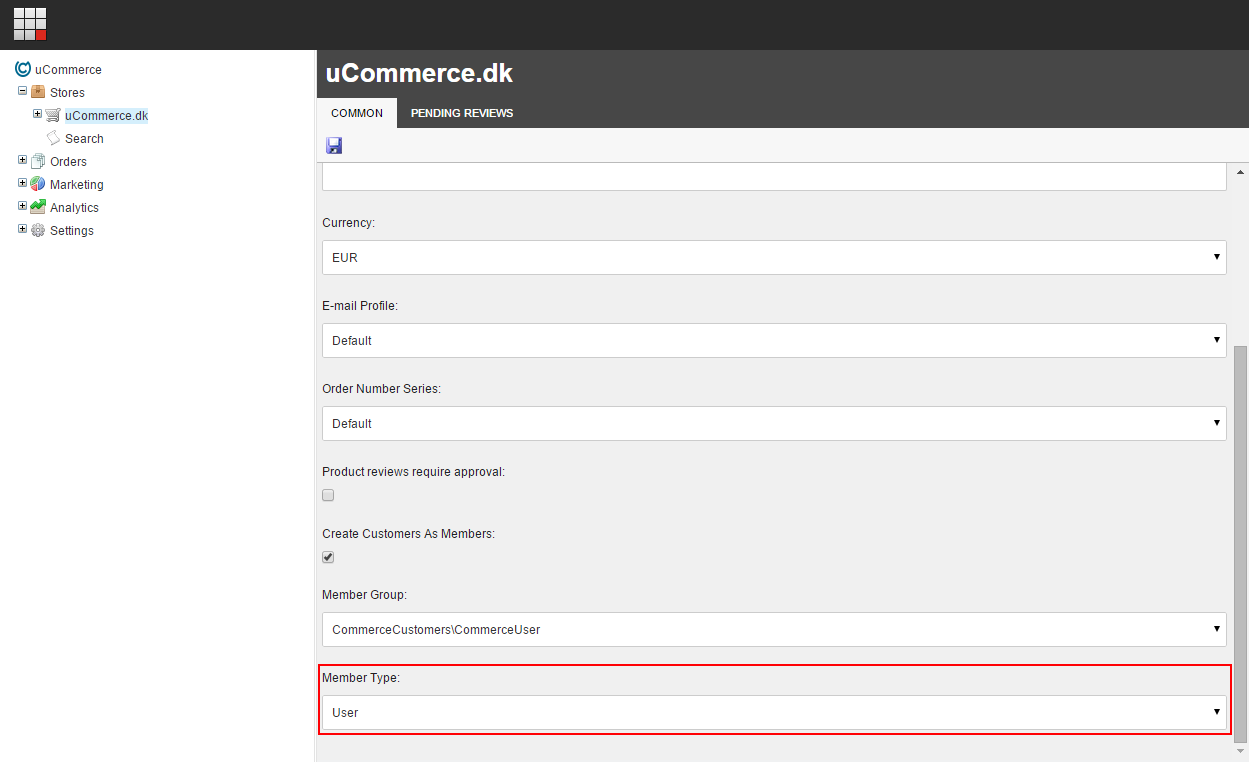
Configure Member Type
You also need to configure a member type for the user created. The member type is used for the user created inside Sitecore.
Identify the customer
After the customer has logged in Commerce Connect need to be notified which customer has logged in.
            //Connects the logged in customer with the Commerce Connect contact.
    		Sitecore.Analytics.Tracker.Current.Session.Identify(email);
Summary
By following the steps outlined in this article you have now installed and activated your own brand new version of Ucommerce and Commerce Connect for Sitecore by:
- Downloading the Commerce Connect package and installing it through Sitecore package installer
- Change the 'Sitecore.Ucommerce.Pipelines.ModifyPipelines.config.disabled' to 'Sitecore.Ucommerce.Pipelines.ModifyPipelines.config' located under '/App_Config/Include/'
- Change the folder name 'Sitecore Commerce Connect.disabled' to 'Sitecore Commerce Connect' located under '/sitecore modules/shell/ucommerce/Apps'
- Restart your website