
Install Ucommerce on Umbraco Cloud
This article will explain how you can get started with Ucommerce on Umbraco Cloud. It is assumed that you already have setup your Umbraco Cloud environments. If you are interested in how to setup Umbraco Cloud, you can find more information here.

When you have finished the installation, you will have all the benefits from Umbraco Cloud on Ucommerce, like below e.g.
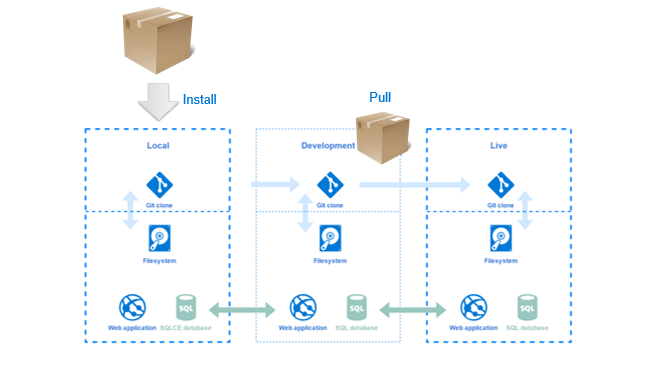
Ucommerce on a local Umbraco Cloud Environment
When you are going to install Ucommerce there is some manually steps that you have to follow before the installation is succeed and you can start using Ucommerce.
Add a new connection
When you are on your local environment, your Umbraco Cloud use a SQL CE database, which Ucommerce doesn't support.
The first thing that you need to do is to setup an empty SQL Express/Enterprise Database, which is going to be your local Ucommerce database. After you have created the database, you need to add a connection string for that database in the web.config.
    <connectionStrings>
    	<remove name="umbracoDbDSN" />
    	<!--Connection string for Umbraco SQL CE database-->
    	<add name="umbracoDbDSN" connectionString="Data Source=|DataDirectory|\Umbraco.sdf" providerName="System.Data.SqlServerCe.4.0" />
    	<!-- Important: If you're upgrading Umbraco, do not clear the connection string / provider name during your web.config merge. -->
    	<!--Connection string for your empty Ucommerce Database-->
    	<add name="uCommerce" connectionString="server=YOUR_SERVER;database=YOUR_DATABASE;user id=YOUR_USER;password=YOUR_PASSWORD" providerName="System.Data.SqlClient" />
    </connectionStrings>
When you install Ucommerce, Ucommerce looks for a connection string with a name equal to "uCommerce". Therefore, is it important that you use Ucommerce as value for the name of the connection string.
Install Ucommerce
The next thing to do is install Ucommerce through the Umbraco back-office as you normally do.
After the installation is succeed and you see the following screen:
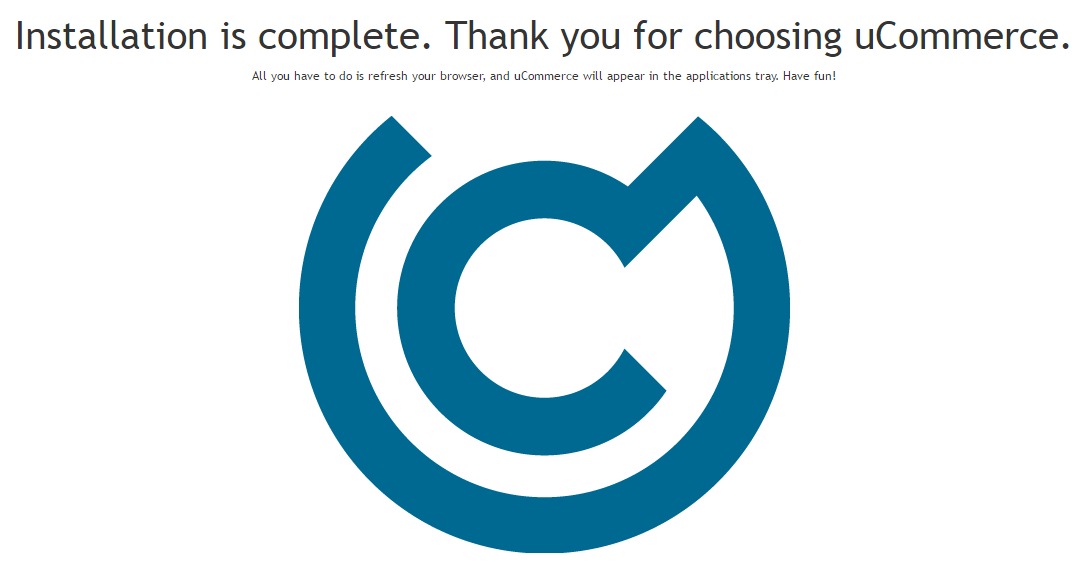
Ucommerce is now installed on your site and all Ucommerce tables are added to your Ucommerce database.
Pushing Ucommerce to Umbraco Cloud
Once you commit and push your local changes to Umbraco Cloud, Ucommerce will be installed there too. But before you do so, you'll need to remove the connection string named "uCommerce" that you added recently. If you leave it, Umbraco Cloud will not be able to find the data and the site will become unavailable.
Please note that any data changes you make to Ucommerce locally will not be pushed to Umbraco Cloud.
If you want Ucommerce data to persist across local and live environments, you can set up a database on a public cloud and point your "uCommerce" connection string to it. Just remember that the firewall for that database needs to allow Umbraco Cloud to access it.