Setup Ucommerce to include Global Collect as a Payment Method
Ucommerce comes with built-in support for Global Collect payments. This guide will help you to setup your installation to use Global Collect as a payment method.
Configuration of account for Global Collect
When you need to setup your global collect account, you need to involve their support to setup the required API calls and IpCheck/ClientAuthentication.
Settings in Ucommerce backend
To add a new payment method to Ucommerce, go to the Commerce section in your installation and in the navigation tree to the left, select settings -> Orders -> Payment Methods. Right click Payment methods and click create. You can use any name you'd like.

Under Service select Global Collect and under Pipeline select Checkout.
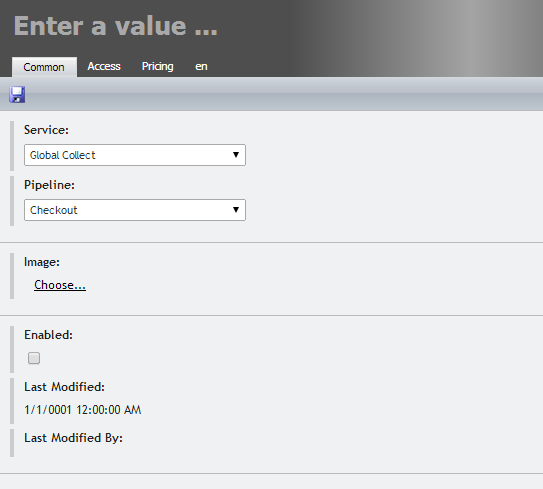
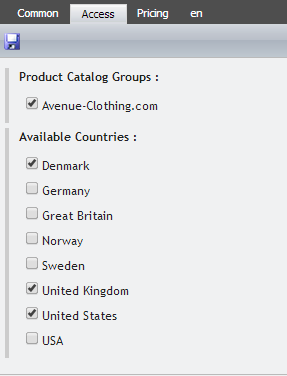
After that you need to select availability under access to match the store you want the payment method to be avilable at together with what countries are available.
Configuration settings
You now need to adjust the properties for the payment method. Under common tab, you'll find the different properties available to set. They should be set accordingly to the descriptions in the table below.
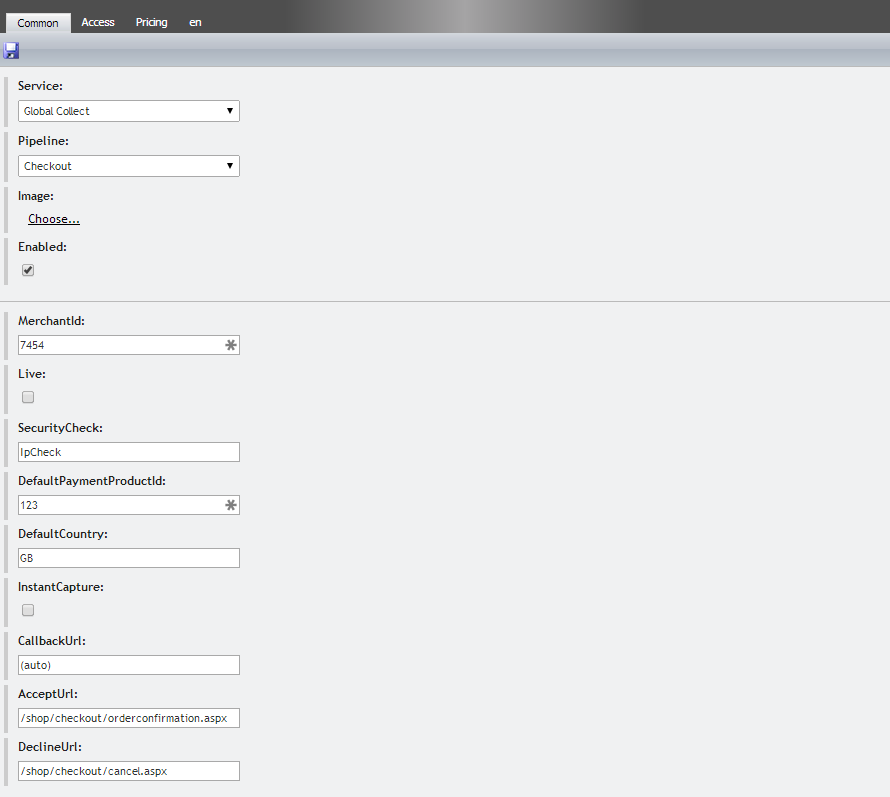
| Parameter | Details |
|---|---|
| MerchantId | MerchantId supplied from Global Collect when your account is created. |
| live | Points the system to a live or sandbox environment. Points to live if set to true otherwise to a sandbox environment. |
| securityCheck | Set to IpCheck if your global collect account is configured for Ip authentication, otherwise set to ClientAuthentication |
| paymentProductId | The default payment product that are selected for the customer. |
| country | Default options that will be supplied when creating the initial request for Global Collect. Otherwise extracted from BillingAddress. |
| resultUrl | Should be set to '(auto)' in case you have customized the flow and need to change the call back url. |
| instantCapture | Tells Ucommerce whether the payments should be settled right away or not. If set to false, the payment will be settled when the order is completed |
| acceptUrl | Points to the relative or absolute url your customer should end at when payments are accepted |
| declineUrl | Points to the relative or absolute url your customer should end at when payments are declined |
Those are the settings needed in the backend.
Creating the payments
When your client walks through the checkout flow, you must make them select between different payment options for the payment. paymentProductId in the configuration sets the default option if you will only allow the one.
Otherwise you must supply different information to get the available options.
Those can be achieved by using the service UCommerce.Transactions.Payments.GlobalCollect.IGlobalCollectService.
    IGlobalCollectService globalCollectService = ObjectFactory.Instance.Resolve<IGlobalCollectService>();
    IEnumerable<IPaymentProduct> paymentOptions = GetPaymentProducts(languageCode, countryCode, currencyCode);
When the user has made his choise, you must save it on the payment for the order BEFORE you request payments, which will redirect the customer:
    Payment payment =  TransactionLibrary.CreatePayment(paymentMethodId, -1, false, true); //Creates the payment and override the existing one. -1 is a dummy amount that will be recalculated by the basket pipeline.
    payment["PaymentProductId"] = PaymentProductId;

    TransactionLibrary.ExecuteBasketPipeline(); //Will bring payments and order in the right stage for payment.
    TransactionLibrary.RequestPayments(); //Redirects to the corresponding payment gateway e.g. Global Collect
Optional: Enable Acquire, Cancel, and Refund in Ucommerce Back Office
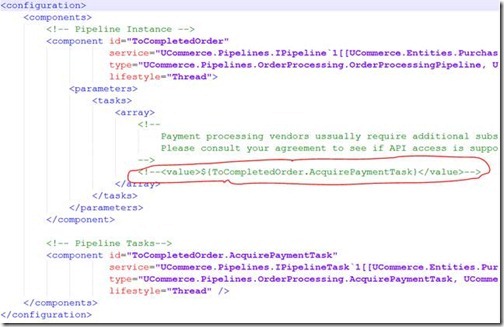
To be able to acquire, cancel, and refund payments you need to enable two pipeline tasks in the ToCompletedOrder pipeline and ToCancelled pipeline.
The pipeline configuration is found in /umbraco/ucommerce/pipelines for Umbraco. The pipeline configuration is found in /sitecore modules/shell/ucommerce/pipelines for Sitecore.
ToCancelled.config
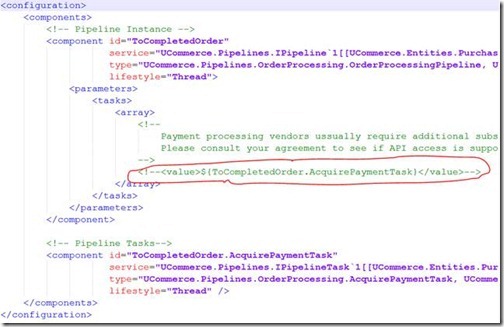
ToCompletedOrder.config
